It’s a terrible feeling – to turn on your favorite synth, and instead of watching it gleefully come to life, you get…nothing. No lights, no display, no sound. Nothing.
It sounds like the worst problem a synth could have – nothing works! But in reality, it could be a simple fix, if you are armed with a multimeter and a bit of sleuthing ability.
A multimeter may sound intimidating, but it’s an indispensable tool, not very expensive, and fairly easy to use. But before we get to that, let’s take a look at what is likely causing your synthesizer to lie comatose.
If turning on your synth results in nothing coming on, the most likely causes are:
A blown fuse
A faulty or incorrect power adapter (if your synth uses this)
A bad wiring connection
A faulty power supply
All of these are pretty easy to check using a multimeter. But to get to some things, you’ll need to open up your synth, and poke around where there will be potentially dangerous voltages. So you’ll need to take some precautions, and if this sounds like it’s more than you are willing to handle, find a tech in your area who can do this job. Read on, and you can at least have a better understanding of what he will be looking for.
Your friend, the multimeter
Ok, now about that multimeter… It is such a handy tool that once you have one, you’ll wonder why you didn’t get it much earlier. You can get a really cheap one at places like Harbor Freight, but spending a bit more (try eBay or Amazon) can get you a quality meter at a good price. You basically want to be able to measure both AC and DC voltages, and have a ‘beeper’ to test the continuity of a circuit.
Some multimeters do not have an audible continuity tester – make sure the one you get does. With that tester selected, touching the two meter leads together will give you a nice beeeeep. That nice synthy tone tells you that electricity can flow from one lead to the other, unimpeded. When you touch those leads to the ends of a fuse, or a circuit trace, that reassuring beep will let you know that the electrons can travel as they should.
Test any external fuse
The first thing to check is any external fuse your synth might have. With the synth unplugged from the wall, look on the back panel, where the power cord attaches, and if there is a fuse, remove it. Set your meter to the continuity tester, and touch the leads to the opposite ends of the fuse. If your meter is silent, then the fuse is blown. Replace it with one of the same rating, and your work is probably done!
If the meter does beep, then the fuse is good, and it’s time to keep sleuthing.
Test the power adapter (if any)
If your synth uses an external power adapter (a ‘wall wart’, or a lumpy thing that plugs into the wall – something more than just a power cord), then it is possible that this has died. Or perhaps you are using an incorrect power adapter. The label – probably with absurdly tiny text – should say what the Output voltage should be. It will say something like 9VDC (this means 9 volts DC).
Test the power adapter by plugging it into the wall, but not into the synth. Put the meter leads on the inside and the outside barrel of the connector, and measure the voltage there (set your meter to read either AC or DC voltage, depending on what the Output voltage of the adapter is supposed to be – most are DC). You should get a reading equal to or higher than the voltage specified on the adapter.
If you get no voltage, or a low voltage, it’s time to replace the power adapter.
If you are using a new power adapter on this synth – one that you have not used with it before – it’s possible it is still the wrong adapter, even if the voltage is ok. It might not have a high enough current rating (the tiny text on the adapter will specify this), or it could be the wrong polarity.
An adapter with a current rating higher than your synth requires is just fine. If your synth requires a 1A (amp) adapter, for example, and you are using one rated at 2A, that is no problem – you will have plenty of ‘headroom’. But if you are trying to use a 0.5A (or 500mA) adapter, it won’t deliver enough juice to power your synth.
The adapter should also show a diagram indicating the polarity, showing either the center pin marked ‘+’ and the outer barrel marked ‘-‘, or vice versa. This must match what your synth requires – and it hopefully has a similar diagram where the adapter plugs in. If the polarity of the adapter is wrong, at best, it won’t work. At worst, it could damage your synth.
(An adapter which delivers AC instead of DC voltage will not have a polarity.)
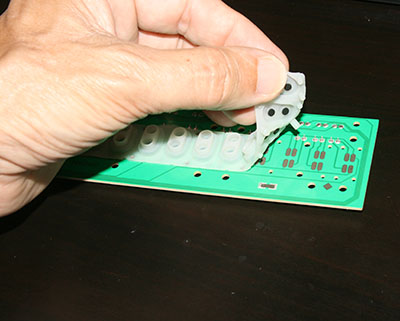
Check for a bad wiring connection
If you’ve made sure the fuse is okay, and any power adapter is working and correct, the next steps require opening up the keyboard. So this may be where some decide to hand off the task to a trained tech. After all, this is where you can be poking around dangerous voltages, and if your synth is still under warranty, it won’t be after you pop the hood.
So, if you continue, do so at your own risk, and be very careful.
Remove the power cord from the wall, and open up the synth. The first step is to simply give a good visual inspection. If you see any obvious signs of burning, you’ve likely found a good clue to the problem. But determining what caused the burning is more tricky, and the synth should probably be handed off to a tech at this point. A burned spot here could be caused by a shorted capacitor way over there, and it takes a lot of circuit tracing to find the culprit.
Another thing to scan for is loose wires. While it’s not common that wires simply come loose, if any did, they should be pretty easy to spot. A synth shouldn’t have any unconnected wires flopping around, so if you spot such a thing, it’s almost a sure sign of trouble. If a wiring harness came unplugged, and you are absolutely sure of where it should be plugged, then try reconnecting it and see if your synth comes back to life.
Sometimes a wire can break loose from a spade connector or from a solder joint, and if that has happened, it won’t be as obvious where the connection is supposed to be; for that repair, it’s probably best to take it to a service center where the tech can confirm – via the schematics – where the wire is supposed to connect, and then he or she can re-solder it.
Check the power supply
If you don’t notice any burned areas or dangling wires, it’s time to check the power supply. This is usually a circuit board inside the synth where the incoming power wires connect. If your synth uses a regular power cord, the internal wires will typically lead to a power switch and transformer, then on to the power supply board. If the synth uses a power adapter, there usually won’t be a transformer, just follow the wiring to the power supply board.
You may find some fuses here that are not accessible from outside the synth. Just as you did before, test these with your continuity tester – you can do this with the fuse still in place, but be sure the synth is not plugged into power! If a fuse is blown, replace it with the exact same type, and see if your synth is happy again. It very well could be a short-lived happiness, as whatever caused the fuse to blow in the first place may well cause it to blow again.
If no fuses are blown, try finding the service manual for your keyboard; with that, you can usually find out what voltages should be present at what point on the power supply. But tread carefully now – further testing requires turning on the power to the synth while you are poking around dangerous voltages! Don’t proceed unless you are confident of your abilities to measure live voltages!
With the schematics handy, switch your multimeter into DC Voltage mode, and test the points where the power supply should be delivering specific DC voltages. A common scenario is that some voltages are correct, but one is significantly lower than it should be, and that indicates that a section of the power supply has gone down.
That may seem like bad news, but the good news is that power supplies are fairly easy to repair, and they use common parts. So while you probably want to get it to a tech at this point, you can at least deliver it knowing that the problem is an easy fix, and won’t require sourcing any hard-to-find components.
The healing process
It could be that none of these things reveal any clues to your lifeless synth – there are many, many things that can go wrong in such a complex electronic instrument. But in most cases where the synth is lifeless, the issue is in the power supply or the parts that feed it.
Following your detective work, it may seem like most of the paths to healing your synth eventually involve handing it over to a repair tech. And while that is not nearly as satisfying as bringing it back to life all on your own, techs charge an hourly ‘bench rate’, and the more you can reduce the time they spend tracking down the problem, the more money you will save on the repair bill.
But perhaps more importantly, your journey down the wires of your synthesizer is a great education, and whatever familiarity you gain with this synth will be a great background for the next keyboard problem you tackle!