
|

|
PLEASE NOTE: While the photos here are representative for this procedure, they may not be of the specific equipment you are repairing.
Important Disclaimer: This information is intended to assist you in repairing your keyboard, which is presumably no longer
under warranty. Doing this type of work will almost certainly void any existing warranty coverage. Syntaur offers this information as a free service,
and makes no warranties of any kind regarding its use. You are solely responsible for any damages, problems, or injuries resulting from opening up
and working on your equipment. Unless otherwise indicated, the keyboard should be powered off and unplugged while these procedures are being done; otherwise,
you can be exposed to potentially fatal voltages. If you do not feel comfortable or competent in performing these tasks, we strongly recommend taking your keyboard to a
service center. |
Whitening Yellowed Keys
|
Many older keyboard keys will yellow with age, and there is a way to restore those pearly whites! This method will either get your keys perfectly white again, or at worst, will make a big step in the right direction - it all depends on the type of plastic the manufacturer used. But in any case, it will be a big improvement.
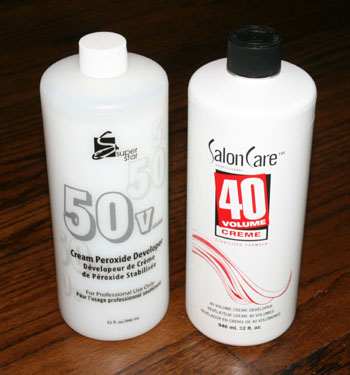
First, you will need to find the secret sauce. You will want a peroxide-based cream that is used for hair coloring; a couple of examples are shown at left. We have found what we need at Sally Beauty Supply, and at wholesalers that supply to salons. You do NOT want straight hydrogen peroxide liquid - it needs to be a cream that can be brushed onto the keys, and will stay there until removed. Once you have the cream, wait for a sunny day, and then remove all of the white keys from your keybed (the black keys can stay in place). Depending on which keyboard you have, this might be an easy thing, or it could be very tedious. Just make sure that you can put everything back where it goes in the end! Snapping a few quick photos could be very helpful. The sun is important - it is needed to react with the chemicals to work the magic, so you may as well keep your keyboard together until the weather is cooperating. The idea is to brush the cream onto the tops of the keys, and leave them in the sunlight for a full day. But since you don't want the cream to evaporate, put the keys inside a sealing plastic bag, or a tub with a clear lid. After a day of sunbathing, rinse the keys off with water, and they should look much nicer than when you started! |