
|

|
PLEASE NOTE: While the photos here are representative for this procedure, they may not be of the specific equipment you are repairing.
Important Disclaimer: This information is intended to assist you in repairing your keyboard, which is presumably no longer
under warranty. Doing this type of work will almost certainly void any existing warranty coverage. Syntaur offers this information as a free service,
and makes no warranties of any kind regarding its use. You are solely responsible for any damages, problems, or injuries resulting from opening up
and working on your equipment. Unless otherwise indicated, the keyboard should be powered off and unplugged while these procedures are being done; otherwise,
you can be exposed to potentially fatal voltages. If you do not feel comfortable or competent in performing these tasks, we strongly recommend taking your keyboard to a
service center. |
You may also want to view:
Opening Up a Korg Poly-61 Keyboard
How to Replace and Repair Dead Keys on a Vintage Synthesizer Using K32U Keys
|
This information applies to the following synthesizers:
|
|
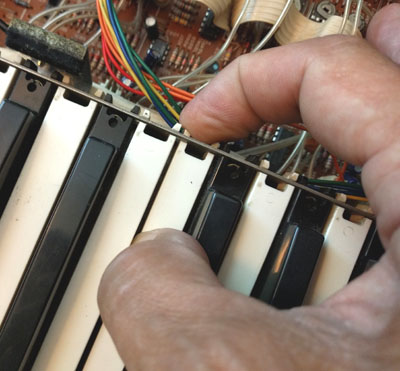
Once the keyboard's top panel is open, a key is easy to remove. Depress the back of the key, and it will go down about 1/4-inch. Then, press with with your finger against the back of the key, pushing toward the front. There are two tabs that secure it to the metal chassis, and they will need to spread slightly to release the key.
(If you need to remove a black key, you will first need to remove the two surrounding white keys - otherwise you won't be able to push the black key forward.) |
|
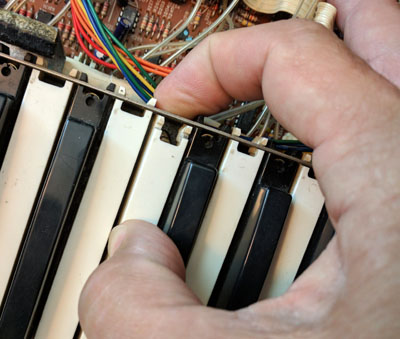
The key should snap out of the metal chassis, then you can move it further forward, and lift it out of the keybed. The return spring may stay attached to the key, or it may come loose - no problem either way. |
|
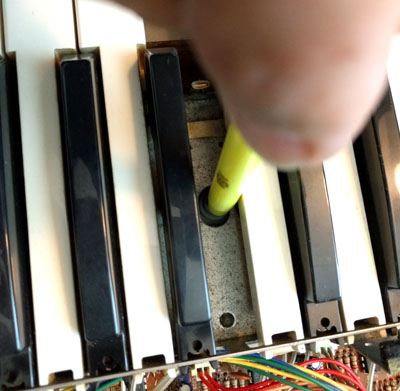
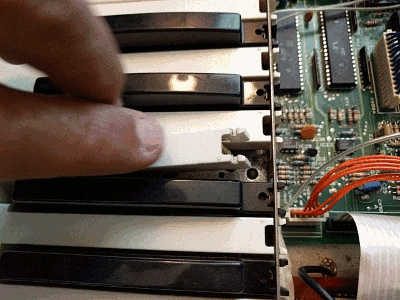
If a key will not play, try pressing directly on the rubber contact strip 'bubble' - you can use a pen, or your finger for this. (You'll need to turn the keyboard on to do this, of course, so don't touch any of the electrical guts, especially around the power supply on the right side of the keyboard.) Usually, when a key doesn't play, you can make the note sound by manually pressing on the contact strip. If you still cannot make the note sound, you will need to replace that contact strip.
If the note does play now, then the fix is simple. All you need is a cereal box (or other thin cardboard), and some scotch tape. |
|
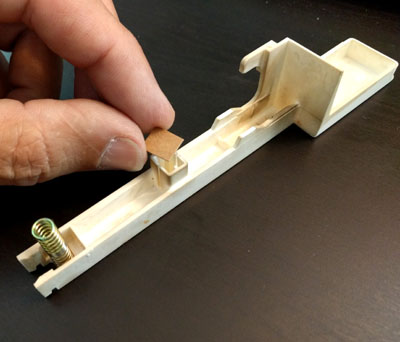
Cut a small rectangle of cardboard, just the size of the protrusion on the bottom of the key. Then tape it in place on the key with scotch tape. This minute difference in the 'length' of the key protrusion is usually enough to make the note work properly again! |

|
To reinstall the key, press the spring into place on the underside of the key - it should stay in place on its peg without having to hold it. (Sometimes giving the spring a little twist helps make it stay put.) Hook the front of the key under the chassis, then guide the back of the key so that the spring sits on the bump in the metal chassis. |
|
With the bottom of the key spring positioned on the metal bump, push the back of the key down, and then press the front of the key, pushing it toward the back of the keyboard. This will take a bit of force, as you are spreading the plastic tabs apart until they snap into place on the metal chassis. Once they do, you're all done with that key. Hopefully, your fix has worked, and the 'dead' key will play once again! |