|
|
PLEASE NOTE: While the photos here are representative for this procedure, they may not be of the specific equipment you are repairing.
Important Disclaimer: This information is intended to assist you in repairing your keyboard, which is presumably no longer
under warranty. Doing this type of work will almost certainly void any existing warranty coverage. Syntaur offers this information as a free service,
and makes no warranties of any kind regarding its use. You are solely responsible for any damages, problems, or injuries resulting from opening up
and working on your equipment. Unless otherwise indicated, the keyboard should be powered off and unplugged while these procedures are being done; otherwise,
you can be exposed to potentially fatal voltages. If you do not feel comfortable or competent in performing these tasks, we strongly recommend taking your keyboard to a
service center. |
You may also want to view:
Opening Up an Ensoniq EPS, EPS-16 Plus, plastic-case Mirage, ESQ-1, SQ-80, VFX, VFX-sd, or SD-1 Keyboard
Removing Socketed IC Chips
Replacing EPROMs on the Ensoniq EPS

|
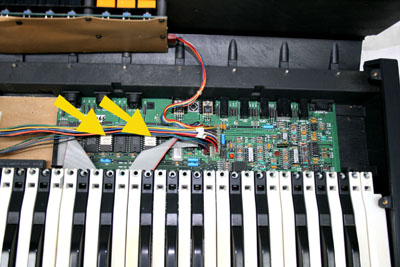
Once the keyboard is open, the EPROM chips are easy to identify - they are the only chips on the main board with paper labels. Remove these two chips from their sockets,
and simply replace them with the new EPROMs, making sure that (a) the Upper and Lower chips go into the correct sockets (they are labeled on the main board itself), and
(b) that the chips are in the correct orientation, with the notch facing the keys (aligned with the notch in the chip sockets).
Close the keyboard back up, and you should be ready to go! |
