| Installing Syntaur's L9KPS Power Supply in the Linn 9000 | ||
|
Important Disclaimer: You are solely responsible for any damages, problems, or injuries resulting from opening up and working on your equipment. Unless otherwise indicated, the equipment should be powered off and unplugged while these procedures are being done; otherwise, you can be exposed to potentially fatal voltages. If you do not feel comfortable or competent in performing these tasks, we strongly recommend taking your equipment to a qualified service center. Limitation of Remedies: Syntaur Productions is not liable for any direct, indirect, consequential or incidental damages arising out of the use or inability to use this product. Some states do not allow the exclusion or limitation of liability for consequential or incidental damages, so the above limitations may not apply. |
||
|
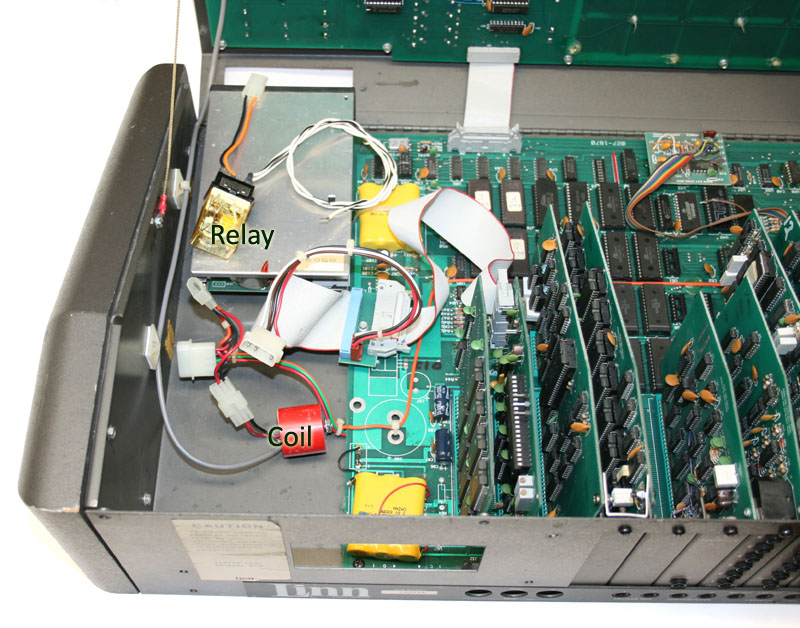
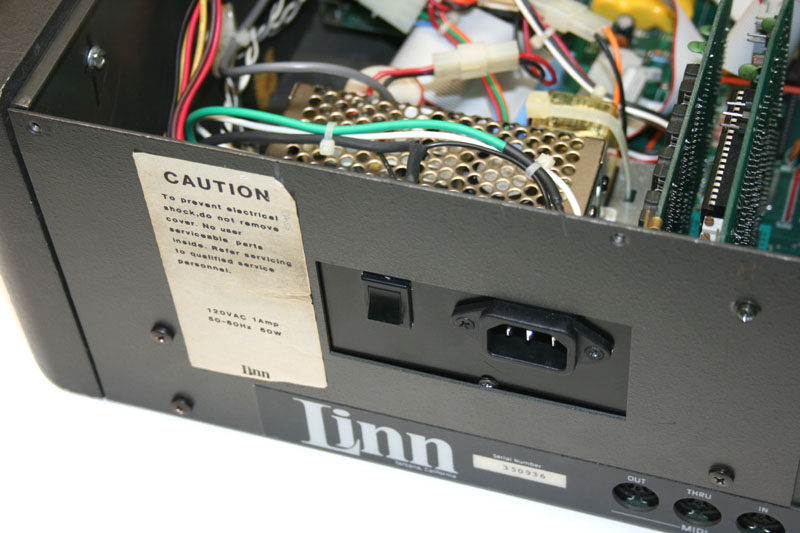
Remove the old power supply from the Linn 9000.
Make sure that nothing is plugged into the Linn 9000, especially the power cable! Open up the unit by removing the four screws along the top of the rear panel; once you remove these screws, the panel should hinge open toward the front. Next, unplug the old power supply; there are two 4-pin power connectors, as well as a 2-pin connector to the relay. The relay also has two wires that are soldered to the power socket and switch; just snip these wires loose at the switch and socket. The gray wire to the coil is soldered and will not unplug; you can leave this in place. Four screws in the back panel secure the metal mounting bracket for the power supply. Remove these screws, and the power supply should come free. Now, remove the round coil from this bracket; it is held in place by a single nut. Next, remove the relay by snipping the nylon cable tie; once this is cut, the relay will snap out of the hole.
At this point, you can set the old power supply aside, and your Linn should be ready for the new supply, as shown in the photo. |
|
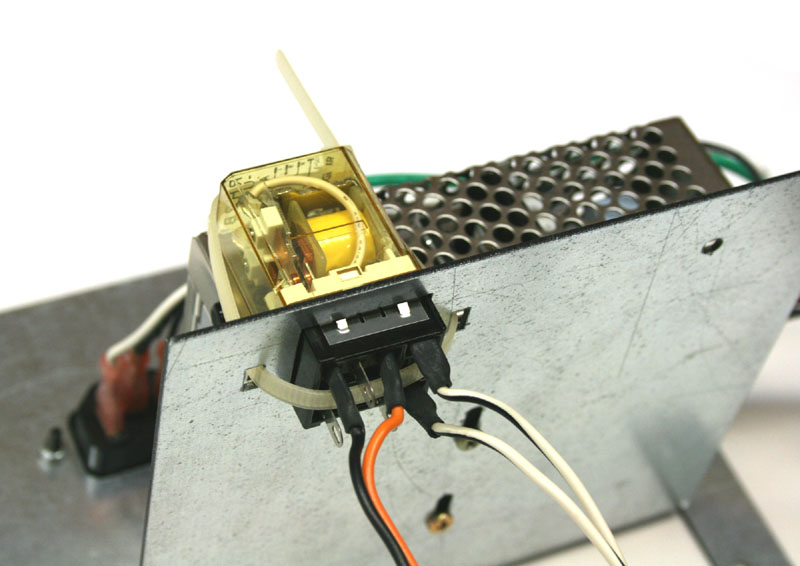
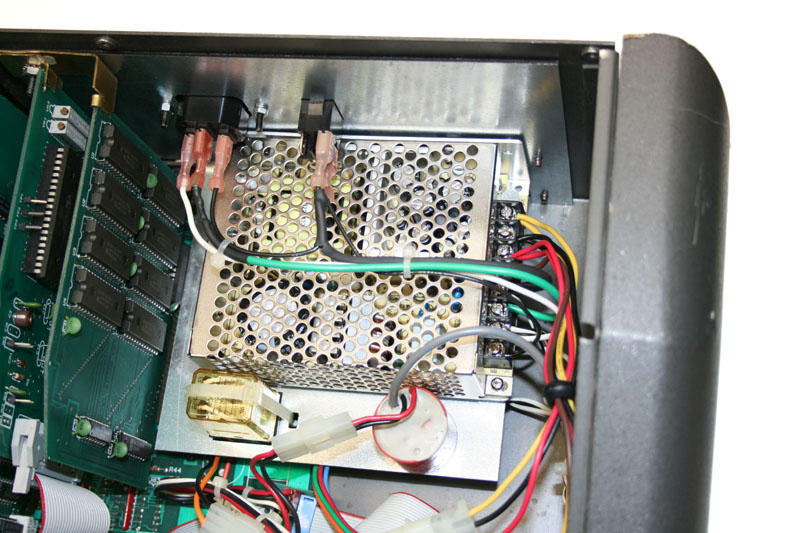
Install the relay.
On the new power supply, slip the relay up through the square hole. Run the nylon cable tie through the slots in the metal bracket, and between the rows of contacts on the bottom of the relay. Tighten the cable tie to hold the relay in place.
Once the cable tie is secured, you can snip off any excess. |
|
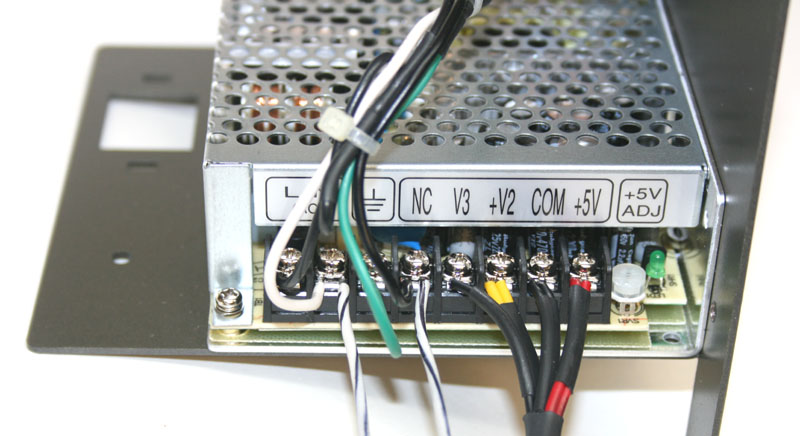
Connect the relay wires.
Strip about 1/4-inch of the insulation from the ends of the relay wires, and connect them to the terminal strip of the power supply. (If you like, you can solder the bare end of each wire to keep it from fraying, or you can crimp a spade onto the end of each wire.)
Connect one of the wires to the terminal labeled 'N' (the second terminal from the
left), and connect the other wire to the terminal labeled 'NC' (the fourth from the left). To do this, simply loosen the screw on the
terminal slightly, slip the bare end of the wire under the screw plate, and re-tighten the screw. |
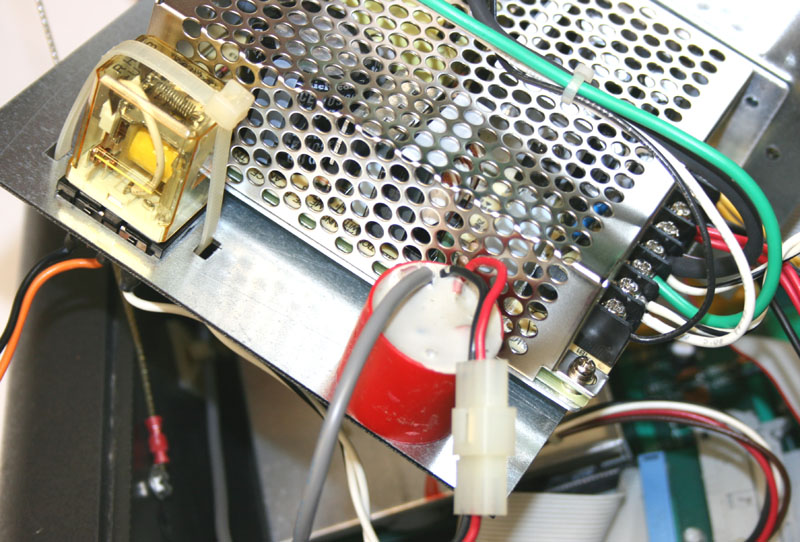
Mount the round coil by slipping the screw end through the hole in the metal bracket. Install the nut on the other side, and tighten.
The power supply is now together, and ready to be secured in the Linn 9000.
Put the power supply bracket into place inside of the Linn 9000, and attach it to the back panel with the four screws provided.
|
Plug in the wires.
Plug in the 2-pin cable to the relay. Next, plug in both 4-pin power cables. Notice that one connecting pair only uses three pins, while the other uses all four; make sure you mate these correctly. Close the front panel of the Linn 9000 (you don't need to install the screws yet), and plug in the power cord. When this cord is plugged into an AC outlet, you should hear the relay click, even with the Linn's power switch turned off. Now turn the power on, and you should see your machine come to life.
If all is well, unplug the power cord, and install the four screws to secure the top panel. You're all done!
|